So you are READY to deploy a settlement. Your reading this guide to make sure you have everything down pat right ? Good – You don’t want to get this wrong 🙂
In our ‘Requirements For a Settlement‘ guide we made sure you have the FIVE Settlement Hubs in your ships Settlement store and a Shiny new License from Ellie Durant.
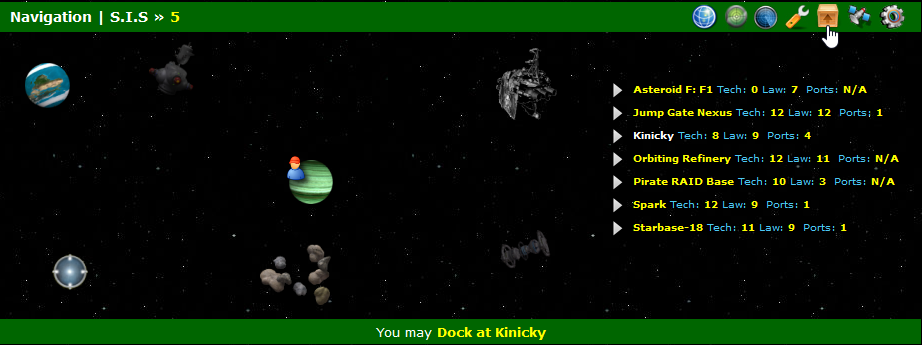
We have arrived at Kinicky in Ferra. This is where we purchased our license for. You should be where ever you purchased yours. When in orbit of the planet you will see a NEW packing Crate icon on the green top tool bar. Click this!
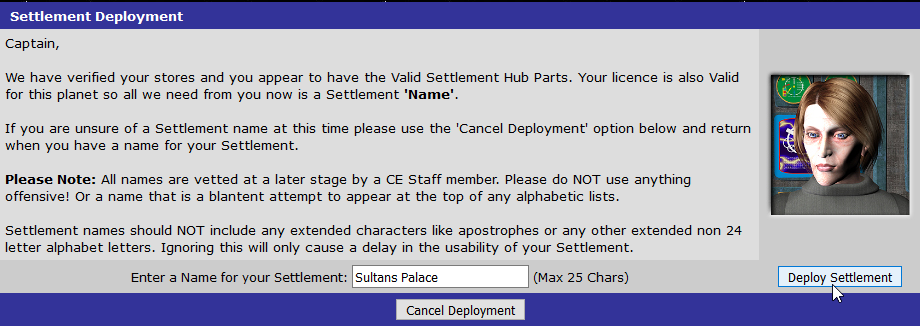
Take your time! READ the text CAREFULLY! – You are about to give your settlement a name. If you get it wrong now it will be with you for a long time to come. You are only allowed to use Alphanumerics and the staff frown on players trying to force their settlement to the top of the list with things like ‘AAA Settlement’
Choose carefully check your spelling and when ready hit the ‘Deploy Settlement‘ Button.
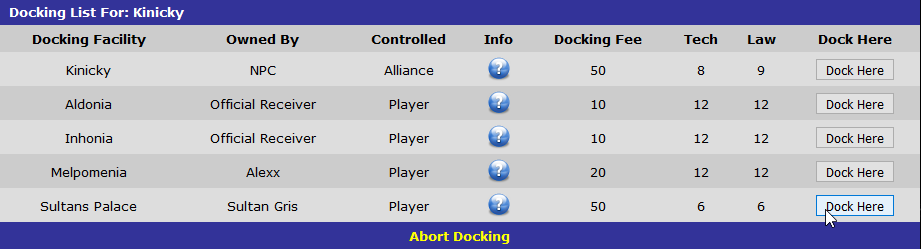
Phew – you got the work part out of the way! Now lets return to the Docking screen and Wowzers! there she blows. Our shiny new settlement! – So lets go ahead and dock shall we.
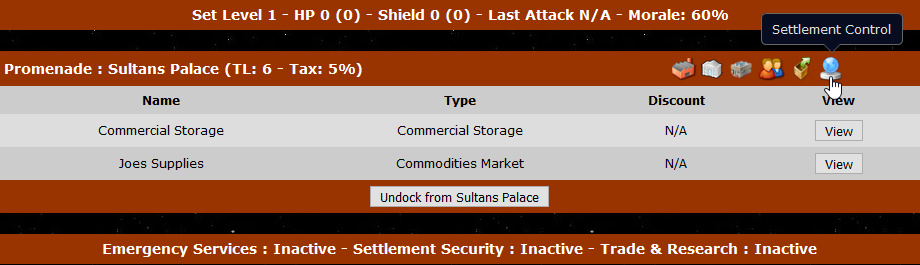
Home sweet home! OK it’s not the Ritz yet and it’s a little barren in the range of options for visitors but that’s going to be your next task for the coming weeks. You can see that your Settlement has a Top bar indicating the following:
Set Level: This runs from 1 to 7 (level 8 currently under design.)
HP & Shield: These will initially be Zero. Don’t worry you will be safe from attack until level 3.
Last Attacked: As above, don’t worry for a while, but when you ARE attacked its displayed here.
Morale: Always keep your staff happy. You start at 60% and need to get that to 100 and remain at 100.
We can also see that we have been gifted two stores. Your very own Commercial storage and a Joes Store. At the bottom of our settlement promenade we can also see a bar indicating the status of our C.A.I.C services. Don’t worry about this until level 4.
Finally – When landing at YOUR Settlements you will see a Blue Orb icon on the far right as indicated above. This is your Settlement Control entry button – Click it!
![]()
A quick over view. Above you can see the header section of your Settlement. This displays the following :
Settlement Shield – This will be Zero.
Settlement HP – This will be Zero.
Settlement Remaining Energy – This will be 5,000.
Staffing – Will read Zero out of a Max of Five.
S.R.P – This is your settlement Research Points – Also Zero.
Settlement Income – Zero
Settlement Running Costs – Zero
Finally, your Settlement Bank – Yes you have your own Bank now!
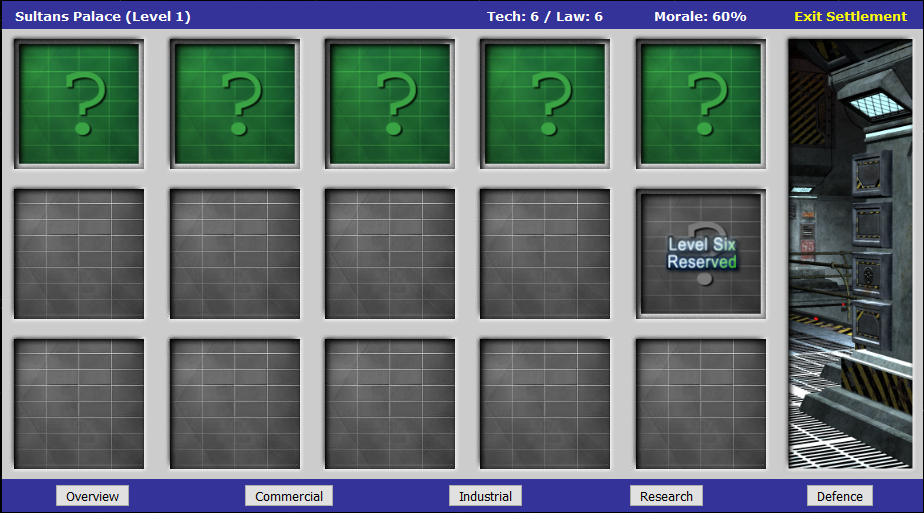
Then we have the actual main section for your Settlement. This where you will be placing your Settlement Buildings. Over time you will level up your settlement and grey sections will open up and become green for you to use. You can see there is one specific slot reserved for Level Six.
At the bottom of this section there are buttons for the following:
Overview: This deals with a lot of the statistics of your Settlement. Also this leads off to Settlement Finances, and Settlement Settings.
Commercial: This displays any stores you have signed up contracts with. If that store offers you an income stream that is shown here along with how long until the contract expires.
Industrial: If you add a Gleso Facility, Farms, Malls, Fabricators this is where you will see the updates and end results.
Research: This is a ‘overview’ of where you are with the various levels of research on each topic. This is NOT where the research is done, just an overview.
Defence: When you start adding offense and defensive items to your settlement This is where they will go. Again at this precise point, dont worry about them for now.
![]()
Lastly, the Settlement Footer. Worth a mention as it has some extra icons that you wont find on normal footers and also you may note a few of the normal icons are missing. I’ll let you peruse these extra icons and familarise yourself with their options.
If you want – why not check out the next Guide entitled ‘Deployed – Whats Next?‘